It occurred to me that once in a while it would be nice to highlight a particular healthful ingredient and give a few examples of how to use it; that way you have a practical starting point to incorporate a new and wholesome food into your routine. Leafy green vegetables are one of the most important elements of a healthy diet, and certainly one of the most sorely lacking elements in the modern American diet. Baby bok choy is a handy leafy green that is super easy to clean, prep, and cook, and it cooks up nice and tender for those who are still getting accustomed to sturdier greens. While it is often associated with Asian cuisine, and does indeed frequently turn up there, you'll also find it popping up more and more on menus in all different contemporary restaurants, so keep an eye out for it and consider sometime swapping the go-to spinach for some baby bok choy. If prepared correctly and not overcooked, it should be tender but not mushy, with flavors of both sweetness and subtle bitterness, and should be a lovely shade of bright green. It is suited very well to Asian inspired sautés, stir fries, and wok dishes, but since you may be familiar with using it or eating it that way already, I thought I'd give you some unexpected alternatives to mix things up a bit. Baby bok choy is one of the most frequently prepared veggies in The World's Tiniest Kitchen, due to it's nutritional content but also its ease and convenience, and I use it as the leafy green in a variety of recipes without feeling the least bit restricted- try these ideas and then have some fun experimenting on your own! Both recipes I have provided here are great for the hot days we are currently experiencing, to fill you up without weighing you down.
(Unfortunately, I do not have photos to accompany these meals, my camera was out of commission, but these are extremely simple and easy meals so you will get the gist.)
French Lentil and Quinoa Mediterranean Pilaf
You will need:
French or "puy" lentils
Quinoa
Carrots
Capers
Olive oil or flaxseed oil
Lemons
Baby Bok Choy
Oregano
Dill
Sea salt
French lentils, sometimes called "puy lentils", are used for this recipe because they retain their shape when cooked rather than coming apart like other lentils.
Cook french lentils and quinoa separately and cool to room temperature.
(leftover lentils and quinoa from a separate meal are particularly convenient for this recipe- I will usually cook a pot of grains and a pot of beans and then use each in various recipes and meals over the course of 2-3 days, and then it's time to make more. This saves time, money, space, and mental energy because part of the question of what to make is answered for you, and you can just keep trying different things with your building blocks!)
Combine both lentils and quinoa in roughly equal measures in a large bowl. Add shredded carrots, capers, flaxseed or olive oil, and fresh squeezed lemon juice. Toss to coat all ingredients, and then season with oregano, dill, and a small amount of sea salt (capers are already very salty), tossing again to distribute herbs. Leave to sit covered to allow flavors to combine.
Then cut each small head of baby bok choi by placing it on a horizontal on the cutting board, cutting off the tip of the bulb end and discarding, and then continuing to make short vertical cuts the rest of the way across so that the greens appear almost shredded. Continue until all baby bok choy is cut (figure about 2 small heads per person, depending on their size, which varies greatly) and submerge all of the chopped bok choy in a large bowl of cool water, moving it around with your hands to thoroughly wash. After washing in the bowl thoroughly, transfer to a colander and rinse thoroughly with new fresh water, discarding the dirty water from the bowl. (Sometimes rinsing well in a colander is enough, but baby bok choy has a tendency to retain dirt and grit from the ground in the little crevices, so better safe than sorry- believe me.) Once clean and rinsed, transfer to a skillet and sprinkled with a few tablespoons of water only. Cover and bring to medium-high heat only for a moment or two to get the skillet steamy, and then turn down to simmer covered on low until the greens wilt but remain bright green and crisp, only several minutes- it cooks very quickly. (This technique is called water sauté and is very useful for preparing leafy greens before use in a variety of recipes; it cuts down on the amount of oil needed, the exposure to heat needed, and produces a tender but vibrant taste. ) If you aren't sure when the baby bok choy is done, err on the side of undercooked, as it is a quickly cooking and will continue to soften once removed from heat. Immediately drain it through a strainer and toss around to cool slightly.
Once slightly cooled but not cold, combine the cooked baby bok choy into the large bowl of other ingredients and toss with tongs to combine and coat all ingredients thoroughly. Taste for seasoning, and add more oregano, dill, lemon juice, olive/flaxseed oil, and capers or sea salt if necessary. Less is more with these last two ingredients- a little goes a long way. This is a delicious one-dish meal for a hearty but cool lunch on a warm day- enjoy!
Tempeh Tacos
You will need:
Plain organic tempeh
Wholegrain corn tortillas (I use Food for Life Sprouted Corn Tortillas, but if you can't find them, use another brand as long as it's made from whole ground yellow corn and not refined corn- and do buy organic, since much corn is genetically modified)
Frozen organic sweet corn
Baby bok choy
Garlic
Onions
Pumpkin seeds
Chili Powder
Unrefined Sesame Oil
Sea salt
Fresh lime (optional)
Cut tempeh into small cubes, and spread out in a skillet along with a small amount of frozen sweet corn (the sweet corn is an accessory in this recipe, not a main ingredient). Pour about half an inch of water into the bottom of the skillet and bring to the boil, then turn down and simmer covered about 8-10 minutes. While simmering, chop onion into small pieces and peel garlic. Next, toast pumpkin seeds in a separate clean dry skillet over low heat until they begin to smell fragrant and turn slightly green-brown, do not toast until dark brown. Set aside. Chop and wash baby bok choy according to method described above, and spread the cut and washed baby bok choy on top of tempeh and corn in the skillet. Make sure there is still a very small amount of water in the bottom of the skillet, which will steam the baby bok choy. Turn the heat briefly higher again to accommodate the cold bok choy, then cover skillet and turn heat back to low for several minutes, just until bok choy looks slightly wilted but still bright green and crisp. Drain all ingredients into colander and toss around to cool, leave to drain thoroughly. Using the same skillet (dry with a cloth first), heat 1 tablespoon unrefined sesame oil over medium-low heat and sauté first onions until translucent and fragrant, adding in garlic part way through until fragrant but not browned. While onions and garlic are cooking, place corn tortillas into the oven on a low temp to heat. Then combine the cooked tempeh, corn, baby bok choi, and toasted pumpkin seeds into the skillet with the cooked onions and garlic over very low heat, and mix to combine all flavors. Season with chili powder and sea salt, and a squeeze of fresh lime juice if desired, and transfer to a large bowl. Remove tortillas from oven once soft and warm, and serve in a stack alongside the bowl of the tempeh and vegetable mixture, filling each soft taco as you go. This is a fun, spicy and flavorful meal that is very filling but won't weigh you down- dig in!
Now that you have two ideas for how to use baby bok choy, go forth and have fun with these and other ideas!
Interested in finding out more about what foods are right for your own body and why? Looking for personalized information and support to help you change your eating and lifestyle choices in order to achieve your own specific goals for health and wellness? Contact me to set up a consultation: erica@wellnessrealized.com
Showing posts with label quick meal ideas. Show all posts
Showing posts with label quick meal ideas. Show all posts
Tuesday, May 31
Wednesday, October 27
Amaranth and Apple Porridge with Chopped Pecans
 I have spoken before on the joys, wisdoms, and powers of a whole grain breakfast including how to work with whole grains in their original form to make nutritious and delicious grain porridges. This recipe is a perfect example, and it was the perfect fix for the cold, grey, drizzly day when I recently made it. What we eat for breakfast sets the tone for the whole day, both physically and emotionally, so make sure you get off to the right start with a meal that is grounding, full of the nutrients your body needs for your busy day, and soothing and comforting to boot.
Amaranth is a lesser known but stellar whole grain that is similar in appearance, taste, and nutritional profile to a tiny version of quinoa, although the consistency and texture when cooked is more like grits. It is packed with minerals and is higher in protein and calcium than milk, while containing the magnesium and silicon essential to support calcium absorption. This tiny, tasty treat is one of my favorite things to cook in The World's Tiniest Kitchen.
Amaranth and Apple Porridge with Chopped Pecans
makes 2-3 servings (can be reheated on the stove for subsequent days)
2/3 cup uncooked amaranth (available at natural food stores)
2 cups fresh water
1 medium apple
4-6 tablespoons chopped raw pecans, plain (or 2 tbsp per serving)
cinammon
agave nectar, raw honey, or pure natural maple syrup
unsweetened almond milk
sea salt
Wash the amaranth carefully with your hands in a medium sized pot with plenty of water. The tiny grains will stick to your hands a bit, but just keep rinsing them off in the water. Then drain the amaranth carefully through the finest mesh sieve- you will need this, otherwise the tiny grains will slip through the holes of your strainer- and rinse well. Transfer the washed amaranth back into the pot with 2 cups of fresh water. Wash, core, and chop the apple into small pieces, and add to the amaranth in the pot. Bring to a boil uncovered, then immediately turn down to low, cover, and simmer covered for 20 minutes or so. Check the consistency and give a stir- it is done when the apple is soft and the grain has absorbed the water and turned to a grits-like consistency. If the grains are appearing wet on top but sticking to the bottom of the pan when you try to stir, turn the heat off and leave the porridge to sit covered on the stove for another 5-10 minutes. The steam and moisture will unstick the grains on the bottom. Now you're ready to dress it up!
 This recipe makes 2-3 servings, so either portion out what you want for yourself and save the rest to reheat on the stove for the next day or two (when reheating add a little extra water if necessary), or portion into 2 to 3 bowls for yourself and your breakfast companions. Top each serving with 2 tbsp. chopped pecans, a healthy shake of cinnamon, a very light swirl of either agave nectar, raw honey or pure maple syrup (remember the porridge is already sweetened by the cooked apple, so you don't need much) and a subtle sprinkling of sea salt to balance the sweetness and bring out all the flavors. You're ready to spoon into some heavenly Fall in a Bowl! But...
For the final act, if you are so inclined, you can top it off with a gentle pour of unsweetened almond milk, which gives an extra creamy and smooth texture to this already comfortingly soft and sweet dish. It's delicious with it, but perfectly adequate without- chef's choice!

Interested in finding out more about what foods are right for your own body and why? Looking for personalized information and support to help you change your eating and lifestyle choices in order to achieve your own specific goals for health and wellness? Contact me to set up a consultation: erica@wellnessrealized.com
Tuesday, October 26
Tortilla Bean Casserole and Arugula Salad with Golden Beets and Artichoke Hearts
 I think we can all universally agree that once the wind starts blowing and the leaves start falling, it's time for comfort food! Well, it's always time for comfort food, but this is the time of year when we start to yearn for something warm and hearty; something deep and flavorful that's been baking in the oven or simmering on the stove. In the World's Tiniest Kitchen, that means it is time once again for Tortilla Bean Casserole.
I have a warm spot in my heart (and my stomach) for Tortilla Bean Casserole, because it is one of the first dishes I created back when my husband and I first moved in together and I was learning the ropes of how to cook for two people who had somewhat disparate food habits, while also sticking to a conservative budget and not spending too much time in the kitchen (this was when The World's Tiniest Kitchen itself was also new to me, I had to adjust).
Enter Tortilla Bean Casserole. I like to call it a Crowd Pleaser, which in my book means any dish I can bring to an extended family gathering or a potluck dinner with friends where I won't get the "oh, more healthy stuff?" routine because it'll be gobbled and gone before anyone thinks to raise an eyebrow. It's also super easy, so it's a great recipe for anyone who doesn't have much experience in the kitchen. Today was the perfect day to cook up a big pan of this dish, and for a light and refreshing contrast, I served it with my Arugula Salad with Golden Beets and Artichokes, recipe below.
Tortilla Bean Casserole
serves 6-8
2 cups uncooked beans, either kidney and black beans or kidney beans and black eyed peas
(canned beans can be used if necessary, see note below on cooking beans)
1 package sprouted grain corn tortillas (ex: Food for Life brand, available at health food stores)
1 jar all natural, low sodium/no salt added tomato sauce
1 1/2 cups organic frozen sweetcorn
1 large onion
2 tbsp olive oil
Spices:
Garlic Powder
Chili Powder
All Spice
Sea Salt
Black Pepper
Soak, wash, and cook beans according to instructions on how and why to cook your own beans here. If using canned beans, you will need at least 2 cans of each kind of bean (4 cans total), and be sure to rinse them well in water. Once beans are ready, set aside. Chop the onion into small pieces, place in a saute pan with tbsp olive oil, and saute over medium -low heat until fragrant and translucent. Set aside. In a large saucepan, heat the jar of tomato sauce over medium heat until slightly bubbly, add the beans, corn, onions, 1 tsp. chili powder and 1/2 tsp. garlic powder, a sprinkle of allspice, sea salt, and black pepper. Simmer on medium to low heat for 15-20 minutes minutes. Taste and adjust seasoning.
Preheat the oven to 375 degrees. In a roughly 10" x 13" casserole pan, ladle about 1/3 of the bean mixture into the bottom and spread it out to form one thin, even layer across the bottom of the pan. Top with one single layer of the corn tortillas, covering the entire surface but not overlapping much- tear them into pieces when you need to cover smaller areas. Then top that with another 1/3 of the bean mixture spread into a thin, even layer, and top that with another solid single layer of tortillas. Spread the remaining 1/3 of the bean mixture over the tortillas in an even layer, and top with the last layer of tortillas. You now have 3 alternating layers of each, and the package of tortillas should provide just enough. Press the top layer or tortillas down a little so that they get "wet" with sauce on one side, and then turn them over and re-layer them with the other side facing down so that the top is now moist. Drizzle this top crust of tortillas with 1 tbsp olive oil and use the back of a spoon to spread it evenly to coat each tortilla. For an extra kick, I also drizzled the top layer with a tiny bit of cider vinegar-based all natural barbecue sauce left over from a trip to North Carolina, if you want to get crafty and try that! Otherwise, you're ready to go. Place in the oven and bake at 375 degrees for 30-35 minutes, until it looks like this:

Mmmmmmmmmmmm......sizzly.
Cut into square pieces as you would lasagne and remove each serving from the pan carefully with a spatula. This makes enough for 6-8 people and is GREAT as leftovers (add some additional tomato sauce when reheating if leftovers seem dry); it freezes well, too, so don't worry if you're making this for just one or two people- plenty to freeze and heat up another time! According to my husband, it tastes best when reheated as leftovers, and that fact plus it's easy transportability makes this is a perfect bring-leftovers-for-lunch meal. Throw some veggies on the side and you're all set!
Speaking of veggies, I served it with....
Arugula Salad with Golden Beets and Artichoke Hearts
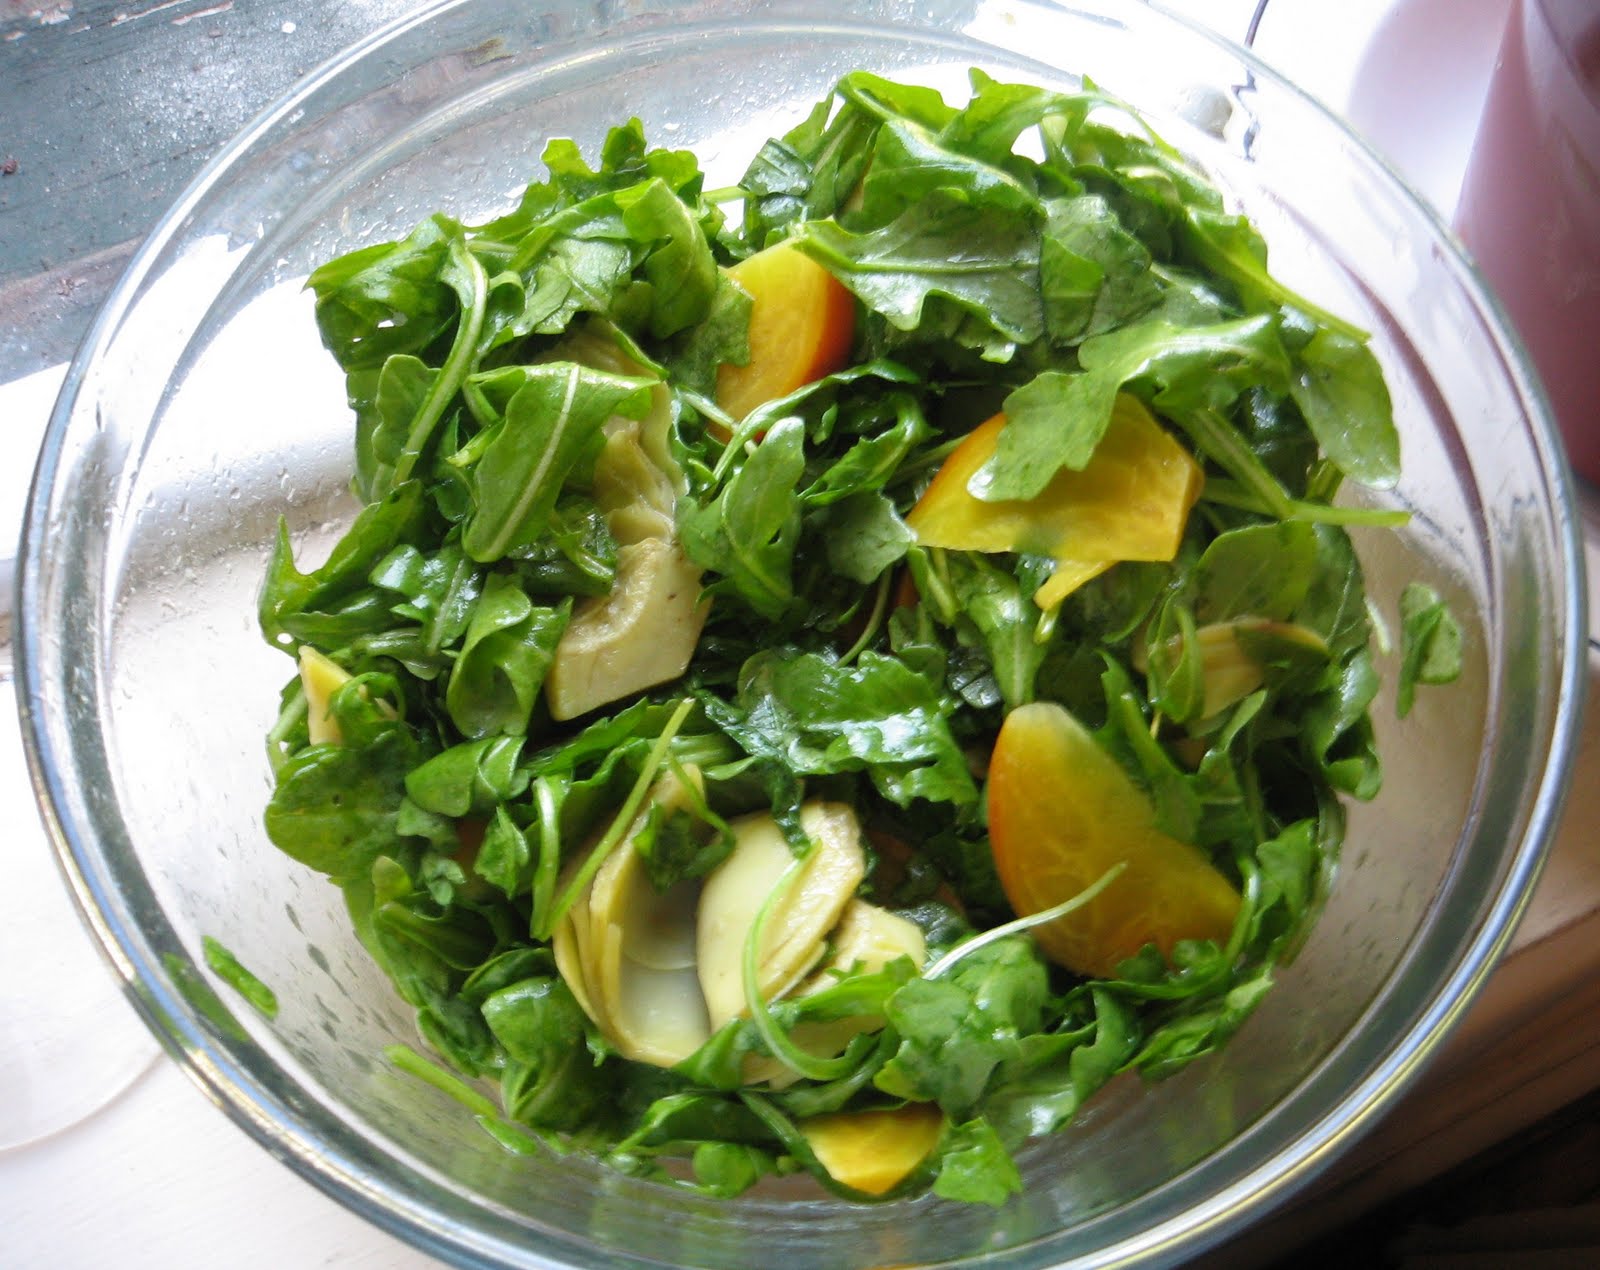 3-4 cups baby arugula
8 pieces frozen artichoke hearts (or roughly 2 large whole artichoke hearts quartered, if using fresh)
1 medium/small golden beet
olive oil
cider vinegar
sea salt
pepper
Wash arugula and spin dry in salad spinner or pat dry with paper towel, place in a salad bowl with room to toss. Scrub beet well, remove rough top, and trim any tough skin around the top, along with the skinniest part of the root if still attached. Cut in half lengthwise and then into small half-moon segments as shown in photo. Place into a shallow saute pan with 1 inch water (along with artichoke hearts if using frozen), bring to a boil, turn to medium heat and simmer for 7-8 minutes. (If using fresh cooked artichoke hearts, cook beets alone). Drain and cool beets and artichoke hearts, toss in with arugula. Drizzle with olive oil and cider
vinegar, a sprinkle of sea salt and pepper, and toss well to coat.
Voila!

This salad is the perfect light, simple, and refreshing accompaniment to the warm, dense layers of the tortilla casserole, but it can be served alongside any dish you like.
So there you have it...a delicious Fall meal, from the World's Tiniest Kitchen to your table. Pull up a seat and dig in!

Interested in finding out more about what foods are right for your own body and why? Looking for personalized information and support to help you change your eating and lifestyle choices in order to achieve your own specific goals for health and wellness? Contact me to set up a consultation: erica@wellnessrealized.com
Friday, October 22
How, and Why, to Soak and Cook Your Own Beans

There's always a pot of beans soaking or cooking in The World's Tiniest Kitchen, and if I can do it here, trust me- you can do it anywhere! Cooking your own beans is easy, the most nutritious choice, cheaper by a long shot than buying canned beans, and despite popular belief, it's not actually time consuming. "Time consuming" means that something is taking up your time or taking time away from other tasks, and when it comes to soaking and cooking beans, it's rather a matter of very short periods of actual time spent interspersed with long periods of time when the beans are doing all the work and you don't even need to be in the room. So when you're ready to make that step and see just how easy, cheap, and deliciously nutritious homemade beans can be, read on!
Let's start with the why: when it comes to the intrinsic energy and quality of our food, we always want to consume food that is as close as possible to it's original state, when it came from the earth. Dried beans have simply been dried in their natural state and then sold- no salt or other preservatives, no chemicals or additives or flavorings, and no sitting around in liquid inside a can for long periods of time. Because they exist in this simplest of states and nothing has been added to them or done with them, they are also very cheap to buy in comparison with canned beans. You buy them in bulk, store them in airtight containers in a cupboard or on a shelf, and they last for months and even years! Aside from that, home cooked beans are easier to digest because the process of soaking and careful cooking descreases their gas-causing tendencies, so if you've experienced gas or indigestion with beans in the past, it's time to give home cooked beans a try.
And now for the how: simply measure out the dried beans you want to use depending on the recipe or use you have in mind, figuring that one cup of dried beans will feed about 3-4 people or servings. Place them in the bottom of a pot or bowl that has a lid, and cover them with plenty of fresh lukewarm water (at least twice as much water to beans). Add in either a bay leaf or a small strip of kombu seaweed (available at health food stores and Asian markets) to help break down the gas causing components of the beans, and nestle it under the beans. Cover with the lid, and leave for 8-10 hours. An ideal time to do this is either before you leave for work for the day so you can cook them when you get home, or before you go to bed at night so you can cook them the following morning or afternoon. Work and sleep are chunks of time already in your day when cooking prep like this can be happening on the side, with no effort! The time of soaking doesn't have to be exact- if you soak them for a little bit less than 8 hours or longer than 10 hours, that's ok, but don't soak them for up to 24 hours or more because they will start to sprout. During the soaking time, you don't do anything with them at all, you can be sleeping or not even home- meaning it takes less than 5 minutes total to measure them out, add water and a bay leaf or kombu strip and cover them, and you spend the next 8-10 hours the way you would anyway. See? Not bad so far.
After they've soaked 8-10 hours, drain them in a collander, discard the soaking water, and rinse them very well with fresh water. Reserve the bay leaf or kombu strip for cooking. Place the bay leaf or kombu strip at the bottom of a large pot with a heavy lid (enamel or cast iron pots work well), and top with the soaked washed beans as well as 3 times the amount of water per the amount of dried beans when you started, i.e. 3 cups of water if you started with one cup of dried beans before you soaked them. Bring to a boil uncovered and leave to boil uncovered for 15 minutes, occasionally checking on them and skimming off any foam that has formed on the surface of the water, discarding the foam. The longer you soaked the beans, the less foam there will be, if any. Then turn down the heat to low, cover the pot with the heavy lid, and simmer for a minimum of 1 hour and up to 90 minutes, depending on the kind of beans you are using (some are harder) and how long you soaked for (longer soaking shortens cooking time).
During this time, you don't need to be in the room watching them; they're just bubbling away on the stove- so while 60-90 minutes sounds like a long time, you're not actively cooking during that time at all. You can be in the other room helping with homework or showering and dressing for the day and tidying the house or answering emails. It's not an exact science when it comes to the length cooking time (are you seeing the pattern here? beans aren't fussy!) - the beans are done when they feel very soft to the touch and to the bite, but not mush. This means a minimum of one hour, but remember that well cooked beans are much easier to digest, so if you are someone who has often had indigestion with beans in the past, go for the full 90 minutes.
When finished cooking, strain and proceed to use in your recipe. However if you are cooking the beans for multiple uses over the course of one to several days, keep them in their cooking liquid in a glass or ceramic container with a lid in the refrigerator and strain out servings as you need them- the liquid keeps them from drying out. Home cooked beans can be kept in the refrigerator for 3-4 days, and can also be frozen for use at a later time. They are wonderfully handy to throw into soups, stews, casseroles, stir fries, salads, and all types of home cooked dishes.
So all told, the process of making beans from scratch does take hours- but you're only actively cooking or working for about 30 minutes of that. Once you get the hang of it, you'll be amazed at how easy it is and how you don't even notice the time passing, because you're doing your own thing the whole time and the beans are doing the work!
You will find that between the soaking, the bay leaf/kombu strip, the skimming off the foam, and the long cooking time, the beans are much easier for your body to digest than the ones being cooked en masse by a food manufacturer and sealed into a can with preservatives. Not to mention that home cooked beans save you a ton of money, and are better tasting and more pleasing in texture than beans out of a can, and best of all, you're giving your body this food in its closest to original state, which is always ideal. Closest to the source is best of course!
(All of this being said, canned beans are convenient, and it's ok to use them when you need to- but it's best to make your own whenever you can. If you do need to use canned beans or would like to simply have a few cans on hand for times when you haven't gotten a chance to make your own, buy a brand such as Eden Organics, which uses a safe can lining, avoids preservatives and additives, and includes kombu seaweed in their ingredients.)
Interested in finding out more about what foods are right for your own body and why? Looking for personalized information and support to help you change your eating and lifestyle choices in order to achieve your own specific goals for health and wellness? Contact me to set up a consultation: erica@wellnessrealized.com
Monday, October 11
Upgrade your Oatmeal

So it's Fall again, and that's good news for Breakfast! Cooler temperatures mean that we are more inclined to seek something warming and hearty for breakfast, and the best bet for a hearty, healthy start to the day is a whole grain porridge. So why is this such good news? Because whole grains are one of the essential foods most lacking in the modern American diet, and they are absolute nutrition powerhouses- packed with protein, fiber, minerals, and energy, these grains are essential for everything from brain function to digestion to blood sugar regulation and energy maintenance. And what better way to start the day that with a bowl of such powerful goodness? I have given an all-purpose description and recipe for whole grain breakfast porridge here and also described a tasty version in the recipe for Breakfast of Champions , so check out those posts for how-to's on incorporating this healthy staple into your breakfast routine. The sky is the limit: you can use leftover cooked grains and add more water, you can cook the porridge from scratch in the morning, or you can cook it the night before and make enough for a few days at a time and just reheat a portion each morning if you find yourself strapped for time.
So what about the ubiquitous oatmeal? Most of you have had it, and many of you eat oatmeal on a somewhat regular basis as a healthy breakfast option. But, unfortunately, all oatmeal is not created equal. Cooking oats from their original state and eating them as a porridge will get you the same wonderful health benefits as the other whole grains described in the posts above, but simply microwaving up a packet of sugary, pre-flaked, preservative- and artificial flavor-laden oat bits isn't much better than reaching for a box of sugary, processed cereal. Many of my clients come to me and say they've been eating oatmeal, but using this quick-fix version because they don't have the time to make longer cooking oats, i.e. whole grain oats. But they find out from me soon enough that they are missing out, both on nutrition and taste! So luckily, I have a solution for them, and for you.
Steel Cut oatmeal, which some of you may already be familiar with, is not the hassle that you may think. Switching from the pre-flaked, processed and heavily sugared and flavored packets of oatmeal to plain steel cut oatmeal that you make yourself gains you the bounty of health benefits described above, while also delivering a much more satisfying, filling, and delicious breakfast. And don't worry, it won't be boring! Instead of banking on artificial flavors and sugars, you'll be sassing up your oatmeal with wholesome, natural toppings. But first, let's make the oatmeal:
Simply measure out 2-3 servings (each serving is 1/4 - 1/3 of a cup of dry steel cut oats), and wash well with warm water in a pot, rubbing the grains between your hands in the water for several minutes, then drain and rinse in a fine mesh sieve (this is essential for cooking with whole grains because it removes the phytic acid inherent in the grain). If you have the time to soak the oats for several hours before washing and cooking, even better, but washing well is fine- no excuses about not having time! Then, boil four times the amount of water to the total amount of oats (i.e. 4 cups of water for 1 cup uncooked oats, yielding 3-4 servings). Once the water is boiling, add the oats, turn down to medium-low and simmer for 30 minutes until a uniform, creamy, grainy texture. Done!
BUT, it gets better....I can hear you now saying "I don't have 30 minutes in the morning to cook breakfast!" and that's fine, many of us don't. But you don't need to miss out: simply switch the cooking time to the night before when you do have some free time, and then reheat on the stove in the same pot the next morning for breakfast, OR, try this nifty trick employed sometimes by myself and many of my clients: go through the initial steps above, but once the water is boiling and you add the oats, simply cover the pot and turn off the heat immediately, leaving the hot pot on the stove covered until morning. The oats cook themselves in that very hot water during the night, meaning no waiting 30 minutes for it to finish; by morning, it's done and simply needs to be reheated for 5 minutes in the same pot on the stove. You can make breakfast for the whole family this way! If you are just making it for yourself, you can still make enough for several servings and reheat on the stove for the next several days (3 days max).
Once you've got your upgraded oatmeal, proceed to the flavor station. Remember from the post on Going With the Grain that the ideal breakfast contains whole grain carbs along with protein and some healthy fat for long term energy and satiation, so a great topping for whole grain, home-cooked oatmeal is a spoonful of chopped nuts, toasted seeds like pumpkin or sunflower, or ground seeds like flax. To kick up the flavor, you can go sweet with a light drizzle of honey, maple syrup, agave or brown rice syrup, or try a sprinkling of dried fruit like raisins or dried blueberries instead. If you like it salty and want to experience how grounding and stabilizing a savory grain breakfast can be, sprinkle some sea salt or seaweed flakes. Be creative!
Once you try this version of the old favorite oatmeal, I think you'll be converted, and you'll see and feel the benefits in your body. Remember, if you try the cook-during-the-night version, this literally only takes minutes from your day! Isn't it worth it for a breakfast that is better in every way?
Interested in finding out more about what foods are right for your own body and why? Looking for personalized information and support to help you change your eating and lifestyle choices in order to achieve your own specific goals for health and wellness? Contact me to set up a consultation: erica@wellnessrealized.com
Tuesday, September 21
Millet Risotto with Basil, Shiitake Mushrooms, and Garlic String Beans
Perhaps you're thinking, "didn't we just see a recipe with a few of these ingredients?" Necessity is the mother of invention. In other words, having the "necessity" to use some vegetables before they lose their freshness and the "necessity" to get your butt into the kitchen and cook something fast because you waited too long and now you're very hungry are both inspirations to invent something new on the spot for your next meal. In today's example, I wanted to use up the shiitake mushrooms and fresh basil from last week's recipe for Tofu, Arugula, and Shiitake Mushroom Sauté before they passed their peak, and I also found myself in the position of being rather hungry and needing to decide what to make fast, not having done any prep work. Fear not, this is not a disaster situation! Merely time to whip up some kitchen magic on the fly.
Using a certain grouping of ingredients more than once in a given period of a few days is a great way to take some of the reinvention work out of cooking and also a smart way to cut down on the amount you have to shop for at once, while also making sure than the beautiful food you have bought won't spoil and go to waste. And it doesn't mean that the dishes you make using a particular grouping of ingredients has to taste the same just because it has some of the same things in it, as this recipe will illustrate- that would be boring, and we don't like boring.
People generally associate risotto with being a creamy, indulgent dish, and this is- but by changing up the cooking method a little bit and using less oil in combination with whole grain millet instead of white rice, it packs in much more nutrition and much less fat than a standard risotto without losing any of the flavor, texture, or indulgence! For the string beans in this meal, I used wax beans (one of several versions of green bean, yellowish in color and sweet in taste) that I purchased at a farmer's market upstate, which worked particularly well, but you can use regular green beans too.
Millet Risotto with Basil, Shiitake Mushrooms, and Garlic String Beans
Serves 2
1 bunch string beans (about two large handfuls)
1 cup chopped shiitake mushrooms, cut into in small pieces
3-4 large fresh basil leaves (more if leaves are small) torn into small pieces
1/2 cup dry uncooked millet
2 tablespoons olive oil, with some extra
sea salt
garlic powder
dried thyme
fresh ground black pepper
Sauté mushrooms in a saucepan with 1/2 tablespoon olive oil and a small splash of water over medium-low heat until they brown and shrink in size. Turn heat off and set aside. Wash millet well in a bowl of water and drain using a fine mesh colander or seive (using a regular colander will result in millet grains washing away through the holes). Combine the washed millet with 1 and 3/4 cups water in a saucepan. Bring to a boil, add shiitake mushrooms, torn up basil, a sprinkling sea salt and a few pinches of dried thyme, then cover and turn down to simmer over low heat for about 10 minutes.
Meanwhile, trim and wash string beans and set in covered skillet with 1/2 inch of water in the bottom, bring to boil and turn down to medium-low heat to simmer steam for about 8 minutes (check a bean part way through- you want them to be juicy and chewable but still firm, not tough and fibrous or limp and mushy). Drain string beans and set aside. Uncover millet mixture, add 1 tablespoon olive oil, stir well, cover again and leave simmering over low heat for another 10 minutes. (At this point when you've added the additional oil, mixture should be looking creamy and still "wet" with the water. If not, add a little more water along with the olive oil before covering to simmer for the last 10 minutes.)
While risotto is finishing, transfer string beans from the colander back to their skillet, drizzle with 1/2 tablespoon of olive oil, a sprinkling of sea salt and a light dusting of garlic powder and stir around to coat. After 10 minutes is done, check millet- the consistency should be very creamy, like that of risotto; if so, it's done. If not, add very small amounts of olive oil and water and continue to simmer until creaminess is achieved; this is why using correct amounts of water in the earlier stages of cooking is a time saver here and results in a more consistent dish. When ready to serve, warm string beans lightly over medium-low heat. Place risotto into mounds on two plates, and serve beans alongside on the plate.
This meal came together in less than 30 minutes with no prep time and no plan in place beforehand...and it was marvelous! All it takes is a little imagination...enjoy!
Interested in finding out more about what foods are right for your own body and why? Looking for personalized information and support to help you change your eating and lifestyle choices in order to achieve your own specific goals for health and wellness? Contact me to set up a consultation: erica@wellnessrealized.com
Friday, September 17
Sandwiches...When You Want Something You Can Wrap Your Hands Around!
I have a lovely, wonderful friend named Shannon, with whom I was a roommate in college. One Saturday, when discussing what she was going to eat for lunch, Shannon said she needed to eat "something she could wrap her hands around". This is a sentiment many of us can relate to (I certainly can), and was well put. She knew a fork and knife weren't gonna cut it this time. My husband is also an enthusiastic lover of sandwiches, as are many people, and it's easy to see why....what's not to love about two pieces of bread brimming with all sorts of tasty trimmings that you can deliver by hand right into your own mouth?
So. There's been a lot of me posting my recipes on here lately and lots of talk about bringing lunch to work and making time in the day for a more relaxed, substantial meal. Worry not, this does not mean we aren't showing love to sandwiches. It's simply a matter of re-imagining your standard sandwich, making some small but worthwhile changes, and getting back to the good stuff....and after trying these substitutions and sandwich ideas, I don't think you'll mind.
Let's start with the basics. Most people envision a sandwich to mean bread, some kind of meat, often cheese, *maybe* lettuce and tomato, and some kind of condiment like butter, mayo, mustard, ketchup, etc. Your standard deli sandwich. Now let's take that model and, without getting too fancy or complicated, turn it into a healthier, more wholesome meal.
First of all, swap out the white or flimsy whole wheat bread for some good, hearty, whole grain bread. It's out there; and it's more substantial and better tasting than the alternatives, not to mention much better for your body. When buying bread, read the ingredients to see what is in it: First of all, skip enriched flours, often listed as the first ingredient. "Enriched flour" means the manufacturer added in vitamins and minerals to make up for the fact that the flour was refined in the first place, thus stripping away these natural essential elements from the grain. Sound counter-intuitive, wasteful, and ridiculous? It is. But you don't have to settle for that- look for whole grain flour, simple as that. Next, look at what sugars, additives, and preservatives are in the bread- you want to keep it simple, bread is an old-fashioned ad straight forward food. You want to see that WHOLE GRAIN is the main element. Buying wholegrain bread from a local bakery helps to cut down on the unwanted stuff, but if that's not an option, your grocery store has better choices too. Do the best you can. Look for nutrition labels that show the most fiber, protein, and minerals while STILL having a simple and basic ingredient list. You don't want them just adding THAT stuff in, either. Keep it real. Real food, real simple.
Next, fillings. If you're going to use meat, get the best quality you can. (And if you're not a meat eater, skip to the next paragraph). Organic is always best when it comes to animal food, and even better if you can obtain it from a local source who can assure the quality and safety of the origin of the meat. If that's not an option, look for store brands like Applegate Farms that assure that the meat does not contain any added growth hormones or antibiotics, and in some cases that the animals were raised humanely. When it comes to amount of meat in the sandwich, less is more: when I make sandwiches for my husband or other people who want to eat meat, I use two thin slices. Two. Think that's crazy? Visit somewhere like Europe and see how much meat they put in their sandwiches. When it comes to protein, we do need it- but we don't need a mound like we get in most American sandwiches. Too much meat in proportion to vegetable food in the meal (and overall diet) results in bloating, constipation, and acid inflammation, not to mention worse...so try to make the switch and realize that when it comes to meat, Less Is More. If you're using cheese, same guidelines: organic whenever you can, or at least all natural good quality cheese, and less is more- one thin slice does the job.
So what are you going to do with all that room now that you've trimmed down your meat and cheese portions? Bring in the veggies. Lettuce and tomato are great, but why stop there? And why so little? Step it up! For greens, try arugula, spinach, or watercress (where I studied abroad in Scotland, sliced hard boiled egg with watercress on wholegrain brown bread was a popular sandwich), and add more volume than you used to. If using lettuce, use the darkest green possible. Slice up tomatoes, cucumbers, pickles, throw in some sprouts, sliced olives, radishes, avocado, or even a layer of cooked vegetables from your leftovers from the day before- why not? Go to town! You're reinventing the sandwich here, don't be shy. Let the veggies take the stage, and you'll be surprised how filling they can be! Also, especially because you're now using nutrient dense, fiber-full, protein-and-mineral-packing whole grain bread, your sandwich will be more filling and long-term energizing anyway, so you won't miss the larger portions of meat and/or cheese, and you'll be doing your body a favor by following the proportions of animal food to plant food that are best for health, digestion, and metabolism.
So what about the condiments, the icing on the cake? If you're like me, you love love LOVE condiments and sauces of any kind, and sandwiches are no exception. I was once told by an Irish person that is not my husband that the typical American refrigerator contains all condiments and no food. While I disagree about the no food part (or at least I hope/believe that is changing), I do agree that as a culture we have a love for the condiment...and we're not ashamed to show it, nor should we be! So feel free to use that affinity for sauciness to dress up your sandwich a bit, but here again, consider some restructuring. For example, if you're going to use higher fat and calorie condiments like butter or mayonnaise, use organic when you can and only use a little. With condiments, we're going for taste and sometimes texture, not bulk or substance, so we really don't need a lot- they're meant to be used sparingly. Next, make use of lighter options like mustard, vinegar, natural ketchup or barbecue sauce, olive oil, pesto, relish, horseradish, sesame tahini dressing, salsa, and many more to add punch, flavor and moisture. Avocado and tomato are particularly wonderful sandwich ingredients because they function as both filling and condiment- both add moisture, flavor, and texture- one creamy, one juicy. For a sandwich revelation and boost to your health, try swapping out cheese in your sandwiches for sliced avocado sprinkled with a little sea salt. It's creamy, fatty, rich, salty...all the things we want from cheese, but with healthier fat and fiber and protein to boot. Your heart will thank you, and your tummy won't mind a bit.
So that's how to reinvent the "standard" sandwich. Now are you ready to shake it up a little? Try skipping the meat....the vegetarians are already used to this, and know how satisfying meat free sandwiches can be. Try the following options as choices for the main filling: hummus, bean-and-grain burger (not processed soy burger), avocado, tofu, or tempeh. Then follow the steps above to pack the sandwich with filling, nutritious, satisfying veggies. Top with condiment combo of your choice, and voila!
Below are some examples of how this simple sandwich wizardry works, and some non-"typical" sandwich options that anyone can enjoy. Don't be afraid to let these balanced sandwiches become a new, healthier part of your foodscape!
Quality WHOLE GRAIN bread topped with...(remember always to UP the veggie portions!!)
-hummus, avocado, sliced tomatoes, cucumbers, mixed green lettuce, and bean sprouts
-bean and grain burger, sliced pickles, arugula, mustard, natural ketchup
-steamed tempeh, sauerkraut, sliced radish, tahini dressing, natural ketchup (kinda like a Rueben!)
-olive tapenade, avocado, sundried tomatoes, drizzle of pesto (less bulky, but more rich....great for a pizza substitute! Also can add spinach or arugula)
-2 slices of any lean meat, spinach leaves, shredded carrot and cabbage, drizzled with olive oil and vinegar.
-Sliced smoked salmon with capers, baby mesclun greens, and raw onion on olive-oiled bread dash of horseradish
-leftover cooked vegetables and beans from another meal thrown into a whole grain wrap, or even wrapped up in a large collard green or lettuce leaf as described in a recipe here
-one sliced hard boiled egg, watercress, sliced cucumber, and toasted pumpkin seeds, light smear of pesto if desired
-almond butter or sunflower seed butter, shredded carrots, raisins, and sliced apples (sound weird? It's awesome. You have the mother of a kid in my 5th grade class to thank for this one....I haven't forgotten!)
The list goes on and on....remember, just have fun with it and experiment. The whole idea of a sandwich is about putting things you like together in new combinations tucked in one handy package, so be bold and don't worry about messing it up...it's only a sandwich!
Interested in finding out more about what foods are right for your own body and why? Looking for personalized information and support to help you change your eating and lifestyle choices in order to achieve your own specific goals for health and wellness? Contact me to set up a consultation: erica@wellnessrealized.com
Monday, September 13
Crunchy Cabbage Salad
Due to popular demand for more healthy recipes on the blog, I will be posting them more frequently and continuing to follow the same criteria: Simple, Healthy, and Quick. Here's a great one that anyone can throw together with just a few simple ingredients, and it's a wonderful way to pack some fiber and vitamin rich veggies and fruit into your day. It's cool and crunchy, sweet and tangy, and it will keep in the refridgerator for a second day so don't worry if you have leftovers! This dish is great as a side with sandwiches for a picnic or bring-to-work lunch, and can be made into a light main meal by accompanying with some lean protein.
Crunchy Cabbage Salad:
1 head Nappa cabbage (if not available, use standard green cabbage)
1 firm, crisp apple- preferably Granny Smith but any kind will do.
4-5 scrubbed carrots (if organic, don't peel)
Juice of 1 large or two small lemons
1/4 cup toasted pumpkin seeds
2 tablespoons olive oil
Sea salt to taste
Place cabbage on a cutting board on the horizontal and shave with a sharp knife into very thin shards. You can also shred in a food processor. Use all of the leafiest parts of the cabbage, and you can leave out the base of the tough core. Set shredded cabbage aside in a large mixing bowl. Shred carrots either by hand with a cheese grater or through a food processor, set aside with cabbage. Wash apple and cut into tiny chunks, combine with cabbage and carrots. At this point you should have slightly more cabbage than carrot; if the proportions are off, add more of either to balance. Mix all ingredients well to combine. Drizzle with 2 tablespoons olive oil and the fresh squeezed juice of one large or two small lemons (make sure seeds are removed), as well as a sprinkling of sea salt. Toss well with tongs to evenly coat all ingredients in the olive oil and lemon juice and salt. Now toast 1/4 cup of raw pumpkin seeds by putting in a skillet over medium-low heat and toasting lightly while stirring, until seeds are golden-green and smelling fragrant and beginning to *pop*. Remove from heat and sprinkle directly into the dressed salad in the mixing bowl, tossing again with tongs to mix all ingredients. Taste and adjust salt if desired. Serve immediately, and cover remainder in an airtight container to be kept in the refridgerator for an additional day.
Variations on this idea: Asian Crunchy Cabbage Slaw
Follow same general instructions above, but trade out apple chunks for shelled edamame beans (adding protein, thus making this a more filling dish). In this version, pumpkin seeds can be switched out for toasted black sesame seeds if desired, and the lemon-olive oil dressing can be swapped out for carrot ginger dressing if desired.
Play around with the options and mix and match (but do not combine apples with beans due to digestion)- have fun with it! This salad is bright, colorful, and has a lovely mix of flavors and textures to please even the vegetable skeptic, so whip one up and enjoy!
Did you know? Pumpkin seeds contain plentiful amounts healthy fats, fiber, and protein but also contain high amounts of zinc, a mineral that boosts the immune system and helps to fight off illness. They add wonderful richness and crunch to salads, grain dishes, and even when sprinkled over soups or casseroles. The toasting beforehand wipes out any bacteria that could be on the surface while also mitigating possible rancidity, and increases digestibility while improving taste. It only takes a few moments, so keep an eye on them and be careful not to burn!
Interested in finding out more about what foods are right for your own body and why? Looking for personalized information and support to help you change your eating and lifestyle choices in order to achieve your own specific goals for health and wellness? Contact me to set up a consultation: erica@wellnessrealized.com
Thursday, June 10
Brown Rice Reimagined
You've all heard that brown rice is good for you. Well guess what- it's not just good for you, it's great for you. It's one of the most nutritious foods available on the planet. It is packed with minerals that help with everything from boosting energy and building bone strength to improving brain function and mood elevation, while the high fiber and protein content (yep, brown rice is packed with protein) assure improved digestion and blood sugar regulation, which means no peaks and crashes in your energy. Say goodbye to that drowsy carb hangover feeling!
But like any other grain or carb, brown rice can seem a little bit boring unless you do something fun with it. Brown rice especially has an unfortunate reputation for being somewhat unpleasantly chewy and bland, but it doesn't have to be! Read on for some great ways to enjoy your brown rice, starting with how to prepare it.
Before cooking, wash raw brown rice very well in lukewarm water and drain through a mesh sieve (the holes in a colander are too big). If you have time, soak it in a bowl covered with lukewarm water for several hours (or even overnight), and then wash it well and drain. Soaking helps to open up the grain and remove the layer of acid on the outside of the grain, but washing is fine if that's all you have time for. Then, combine 1 part rice with 2 1/2 parts clean water in a pot, bring to a boil, then turn to low heat, cover with the pot lid, and simmer covered until all water is absorbed (25 to 30 minutes roughly, but check to avoid burning). This will make a lovely moist, fluffy, dense, and somewhat sticky rice. If you like your rice "drier" and less sticky, use closer to 2 parts water per 1 part rice. Part of the beauty of brown rice is that it has a delicious natural sweetness, and the longer you cook it, the more this sweetness comes out. Using the extra water results in longer cooking, and therefore a sweeter rice. But it is a matter of taste.
Once you have cooked your brown rice, read below for some fun things to do with it. Don't hesitate to experiment with brown rice or other grains and mix it up with your own ideas; grains are like bread, they are a medium upon which you can add all different textures and tastes without really going wrong. The possibilities are endless!
Here are some that I've created in my kitchen laboratory:
Candy Rice
This dish is so sweet and colorful that I couldn't help but name it Candy Rice, even though the health benefits it provides make it the furthest thing from candy! Packed with grounding, vitamin rich and fiber full root vegetables, this dish will have your body thanking you even more than your taste buds are...now that's sweet.
2 medium carrots, scrubbed and cut into rounds or small chunks
1 medium beet, scrubbed well, top and bottom removed, cut into small chunks
1 small to medium onion, cut into chunks
1 cup cooked brown rice (cooked beforehand)
1 tablespoon unrefined sesame oil
Sea salt and fresh pepper to taste
Preheat the oven to 400 degrees. Add the chopped vegetables to a medium size roasting pan or cast iron skillet and drizzle all over with the 1 tablespoon sesame oil, moving them around in the oil to make sure all pieces are coated. Sprinkle with sea salt and pepper, and roast in the oven at 400 degrees for 20 minutes or so. Remove, shift vegetables around in pan to distribute heat and evenly coat with oil, and put back in oven for another 15 minutes or so. They will be done when they are sizzling and soft to pierce with a fork, but not brown or falling apart. Remove the pan from the oven, and add the cup of cooked brown rice right into the pan. Gently and thoroughly stir all the ingredients around to mix well; the rice will soak up the extra sesame oil in the pan, and will turn a lovely mottled pink color from the juice of the beets. Serve immediately, or leave to sit covered at room temperature to let flavors combine and all the oil be absorbed. Due to the earthy sweetness, this makes a great accompaniment to a dish with a contrasting flavor, such as spicy or bitter; I served it with a dish of lightly sauteed radicchio and kidney beans seasoned with coriander and topped with a raw sauerkraut garnish. The bitterness from the radicchio and the tartness of the coriander and sauerkraut were so perfect when paired with the sweetness of the candy rice! Who needs dessert after a meal like that?
Breakfast of Champions:
If you're ready to try something truly different for breakfast, try this savory, Asian-inspired treat that will give you buckets of energy due to its high protein and mineral content, with just enough good fats to keep you satisfied well until lunch. The sauerkraut, since it is a fermented food, provides powerful grounding energy and a boost to intestinal health by balancing intestinal bacteria and thus assisting in digestion and assimilation. Also makes a great brunch or lunch option. Who says breakfast can't be savory?
-1 cup cooked brown rice
-2 tablespoons unshelled and toasted sunflower seeds or pumpkin seeds (toasted by stirring in a dry skillet over medium-low flame for just long enough for them to begin to pop and change color slightly, but not burn. Can be made ahead of time.)
-2 tablespoons kimchee, sauerkraut, or other pickled vegetable, OR, if pickled anything isn't your thing, throw in some leftover roasted veggies such as carrots instead
-1 tablespoon dried seaweed flakes (such as dulse, nori, or a mix, available at health food stores)
Special addition optional: top with one organic egg, soft boiled or soft fried
Mix all ingredients in a bowl and enjoy! It's that simple. If you are using the egg, mix all ingredients in a bowl first and then top with one boiled or fried egg, soft cooked so that the yoke mixes into the rice and when cut up. This is delicious, and if seaweed and pickled vegetables anytime before noon (or anytime EVER) sound crazy to you, try it without those ingredients and throw in some diced up leftover cooked veggies or just season with sea salt and pepper and enjoy a simpler version. You can start there and experiment more later. Like it sweet? Try the same idea, but nix the seaweed, sauerkraut and veggies and opt for some dried fruit and a drizzle of maple syrup, honey, or agave nectar.
Money Rice
Collard greens are traditionally associated with a hope of wealth in Southern culture, but it's your body that will be getting rich off of this dish- dark leafy greens are incredibly detoxifying due to their vitamins and high chlorophyll content, while pumpkin seeds provide healthy fats and zinc which strengthens the immune system, especially beneficial for women's health issues.
1 cup cooked brown rice
1 bunch collards greens, center ribs removed, sliced into thin ribbons
2 tablespoons toasted pumpkin seeds (see instructions above for toasting seeds)
2-3 tablespoons finely diced onion
1 tablespoon sesame oil
Sea salt and pepper
Once the collard green leaves have been stripped of their center ribs and sliced into thin ribbons with a sharp knife, submerge them in a deep bowl of cool water and move them around to release any stuck on dirt, then drain. Add still-wet collard green leaves to a saute pan or skillet, cover, and turn heat to medium-high. Within a few short minutes, the small amount of water on the leaves from washing will have heated up and provided enough moist heat to cook down the leaves to a wilted state while preserving their bright green color (this method is called "water saute", and can also be done with a small amount of water in the skillet). At this point, remove from heat and place back in strainer to drain out any excess moisture. Meanwhile, heat 1 tablespoon of sesame oil in the same skillet (dry the skillet in between if necessary) and saute the 2 tablespoons of diced onion until well cooked and fragrant, even caramelized. Toss in cooked collard green leaves and toasted pumpkin seeds and coat well with the oil and onion. Finally, mix in the cooked brown rice and toss all ingredients in the skillet to combine and spread the oil and flavor throughout. Season with sea salt and fresh ground pepper. This dish received very high marks from the Husband, and is versatile because it can be switched up to include pretty much any other dark leafy green, and the pumpkin seeds can be switched for sunflower seeds, sesame seeds, or even pine nuts.
Possibilities with brown rice and other whole grains are endless, so get to know and love them! Brown rice works particularly well in the above recipes, but you could substitute a grain like quinoa or barley as well, with an equally nutritious and delicious result. Happy Eating!
Interested in finding out more about what foods are right for your own body and why? Looking for personalized information and support to help you change your eating and lifestyle choices in order to achieve your own specific goals for health and wellness? Contact me to set up a consultation: erica@wellnessrealized.com
Wednesday, June 9
Green Smoothie
Here's a great way to boost your intake of vegetables and fruit, especially on hot days when you just want something light and refreshing or on busy days when you don't have as much time to prep and cook. Making this recipe as a smoothie as opposed to a juice ensures that you get all of the fiber as well as the vitamins and chlorophyll from the fruits and veggies. Due to the protein, fiber, and healthy fat in avocado, it's also surprisingly filling and very creamy, so drink up and get ready to feel great!
Ingredients:
-1/2 a ripe avocado, cubed
-juice of 1/2 a lemon or 2 tablespoons lemon juice
-1/2 an apple, washed and cut into pieces
-Small amount of sweeter fruit, like a small handful of strawberries or other berries
-2 big handfuls washed dark leafy greens (kale, watercress, or collard greens work best)
-Small handful of washed fresh parsley (optional, great for cleansing!)
Once all ingredients are washed and chopped, combine in a blender with 2 1/4 cups water and blend until completely smooth. Enjoy! This is a great breakfast option when you want something light but substantial and filling, and this recipe makes enough for 2 servings and keeps well in the fridge for hours...so you can have the rest at lunch or dinner!
Interested in finding out more about what foods are right for your own body and why? Looking for personalized information and support to help you change your eating and lifestyle choices in order to achieve your own specific goals for health and wellness? Contact me to set up a consultation: erica@wellnessrealized.com
Wednesday, December 9
It's the Holidays, Here Comes the Sweet Stuff!
Cravings for sweets aren't always a bad thing. It's true that often when we are craving sweets it is because of some other need that is going unfulfilled; many needs both emotional and physical will present themselves as a craving for sugar when really it is that we are lonely, or restless, or bored, or tired, or over-caffeinated, or dehydrated, or have eaten too much protein or fat and are trying to balance it out. All of these needs can be perceived as a strong desire for sweets. Unfortunately, many people respond to such cravings by going for processed, refined sugars and sweet foods, which act like a drug in the body by making the body want more while also straining the body's resources even further and resulting in more cravings, thus becoming a viscous cycle. This is why it seems impossible to avoid the candy bowl or the cookie plate once you've caved in and had a nibble.
However, it is natural for our bodies and palates to seek out sweetness in foods, so it's good to satisfy that desire- but it is important to do so with natural, wholesome, unrefined foods. Wholesome sweet foods benefit the liver as well as the spleen-pancreas, while also giving us a sense of satisfaction and well being: the "sweetness of life". They key is to pay attention to quality and amount. Some often overlooked healthy sources of sweetness are sweet vegetables such as sweet potatoes, sweet squashes like kabocha (green pumpkin), acorn, butternut and pumpkin, carrots, rutabaga, parsnips and beets, as well as a plethora of fruits. At this time of year, avoid tropical fruits that can be too sugary and cooling for our winter systems- instead opt for fruits such as pears, peaches, apples, berries, cherries, and melons, which are lower on the glycemic index (meaning they cause less of a surge in your blood sugar) and can be grown in locales most similar to where we live.
Aside from fruits and veggies, experiment with making life sweet using all natural, wholesome sweeteners such as pure maple syrup, brown rice syrup (a little-known but wonderful and healthful condiment), barley malt syrup, honey or agave nectar. Try drizzling one of these sweeteners over toasted nuts mixed with raisins, or heat up some leftover brown rice or other grain and add a sprinkling of nuts, a shake of cinnamon, and a drizzle of one of these delicious sweeteners for a warming, substantial sweet snack.
Also, rather than thinking of desire for sweets as something only satiated by snacks and desserts, bring sweetness into your main course meals. "Sweet" is one of the tastes our bodies are programmed to want naturally, so when we include the sweet taste IN our meal, we are less inclined to go for dessert or sweet snacks later. For example, tonight I will be making aduki beans (small, red beans that lend themselves well to sweet flavor) cooked together with chunks of sweet, tender acorn squash and sweetened with a little bit of pure maple syrup, served over a bed of quinoa with sauteed garlic green beans on the side. After a meal as sweet as that, who needs dessert?
Interested in finding out more about what foods are right for your own body and why? Looking for personalized information and support to help you change your eating and lifestyle choices in order to achieve your own specific goals for health and wellness? Contact me to set up a consultation: erica@wellnessrealized.com
Tuesday, April 14
Green Leaves- It's A Wrap!
Bored of the same old sandwiches and looking for a way to cut some carb calories and add some easy veggies into your diet? Consider a new take on your classic sandwich or wrap- cut the bread. I am not an advocate of no-carb or even most low-carb diets, but as I have said before, it is a question of WHICH carbs you are eating. Most bread and sandwich wraps are mainly refined carbs made from processed flour, which means that much of the fiber and nutrients have been removed and often sugar and preservatives have been added. The calories? Yep, they're still there. And don't fall into the assumption that a wrap has less calories or is more nutritious than bread for your sandwich: it simply is a case of the bread in a wrap being more dense and flat due to not having been risen with yeast. Most wraps pack a serious carb and calorie wallop before they're even filled, unbeknownst to those chomping down on them. So consider saving the majority of your carb consumption for whole grains in their original form such as brown rice, barley, oats (as in oatmeal), quinoa, millet and buckwheat. When it comes time for lunch, you can still have a quick, easy, eat-with-your-hands meal by using the broad, flat leaves of leafy green veggies as the vehicle for your fillings.
My personal favorite for this purpose is collard green leaves. Most people have only had collard greens cooked in the traditional Southern manner (boiled for ages and then seasoned with lard and/or bacon and tons of salt), or they've never had them at all. Collard greens are packed full of fiber, vitamins, and nutrients, as well as chlorophyll that is essential for healthy GI tract functioning and liver and kidney function. Collard green leaves can be purchased at your fruit and vegetable market or in the produce section of your grocery store; they come as a bunch of large, flat, dark green leaves with a rib down the middle. All you need to do is remove the bottom two inches or so of the rib that sticks off of the leaf, wash and pat dry, and your ready to make your "wrap".
Take one leaf, spread with a small amount of your dressing of choice if desired, then make a long, thin, horizontal pile of your fillings towards one end of the leaf, and roll up. Pretty simple! My suggestion is to use several leaves and parcel out your sandwich fillings amongst them- that way you are getting several large leaves at one sitting and increasing your vegetable-to-protein intake; more fiber and nutrients to benefit from, and better for your digestion, too. Divide up tuna salad or hummus or marinated tofu sticks and add toppings such as avocado, olives, shredded carrots, or alfalfa sprouts, and then roll up. Another great option is to throw in your leftovers, like cooked rice and/or beans and a mix of cooked and raw vegetables. If you want to make a meat sandwich, consider using one slice of cold cut per roll along with lots of other veggies and your dressing of choice. This will also help you to fill up on veggies and cut out excess meat protein from your meal- you only need a small amount of meat to get the benefit of the protein, and most deli sandwiches as you may have noticed really lay on the meat, to the detriment of our health and our waistlines.
If you don't have collard greens handy or can't find them at your store, you can also use this idea with romaine lettuce, boston lettuce, or butter lettuce; anything green that has a flat and sturdy enough leaf to pile fillings into and roll up. But remember, while lettuce is good, darker and more fibrous greens such as collards give you more bang for your buck in the nutrition department. Happy Eating!
Interested in finding out more about what foods are right for your own body and why? Looking for personalized information and support to help you change your eating and lifestyle choices in order to achieve your own specific goals for health and wellness? Contact me to set up a consultation: erica@wellnessrealized.com
Wednesday, February 18
Taking Time vs. Making Time
My high school guidance counselor, who was also my Physics teacher, once addressed our class and said "People, there is one thing in this world that you will never have enough of, no matter what. That is Time."
At the time, I thought it was very profound and absolutely 100% true, I myself being a person who has perpetually struggled with the art of time management since I arrived into this world. However, now that I have some more age and experience under my belt, I can see that while on the surface this appears to be true, it is also the generally held idea of "not having enough time" that keeps us stuck in habits of time wasting and stressing about time, all the while holding us back from truly enjoying and using to our highest benefit the time that we do have. Let's be honest: we have days, weeks, months, and years. We do have all the time that we need; it is a matter of learning a balance between prioritizing how we spend that time and also going with the flow, and that I think is what was at the root of what my teacher was trying to impart to us. He was trying to tell us that we needed to learn to live our desired lives while accomplishing what we needed to get done in the time that we DO have, rather than to focus on an idea of endless time that does not exist.
It is easy and very human to get stuck in a broken record message of "not having enough time" to cook dinner, bring lunch to work, go to the gym, take a walk, play with your kids, have a heart-to-heart talk with your partner, look for a new job, or clean your apartment. In reality, we spend minutes, hours, days and weeks telling ourself how little time we have while we tune out in front of the internet, the TV, or at work, numbing ourselves to needs that we want and deserve to fill "if we only had the time". Everyone can relate to this...when was the last time you got so worked up about how little time you had that in the end you got nothing on your list done, not even the "important" things? We need to tune out that mental noise and still the anxiety inside of us about not having enough time, and instead repeat the message to ourselves that we have all the time that we need, and WE decide how we are going to use it. Because, no matter what, it is important for us to realize the truth in that statement. Everything that we do, everything that we say, everything that we make, use, or eat, is a choice.
So what matters to you? I hear so often "I don't have time to do that". So often, it is an excuse that a person is using to keep themselves in the same safe, numb routine of not having to push themselves, not having to face the fear of bettering themselves or taking on new goals. It is a message that's been repeating in the person's mind for so long that they don't even see the damage that it's causing by depriving them of the satisfaction that they are capable and deserving of. At the root of it, it's a way of cheating oneself, and keeping oneself down, because it's familiar and easy that way. We do it all the time, and we don't have to!
Let's take exercise: people say that they don't have time to go to the gym or exercise. Generally speaking, 45 minutes to 1 hour of the day, 5 days a week should be spent doing some kind of physical activity or exercise, but 30 minutes a day is a great start. So let's say you have a heavy work schedule and feel that you can't give one hour of the day 5 days a week to the gym. You say to yourself "Well forget it, if I can't do that, then why bother with anything". But wait. If you live in a city, you can walk to work. 9 out of 10 days, the weather is just fine for walking to work, even in winter. We all have coats and scarves and gloves; bundle up! 20-30 minutes each way walking to and from work gives you between 40 minutes - 1 hour of exercise 5 days of the week; it's completely free, and actually saves you money on your transportation costs. Not to mention, most people's subway commute with walking on either end winds up taking about 30 minutes anyway, so that gets rid of the "not having time" excuse. Not into walking outside? Weather just too awful? Buy yourself a few inexpensive workout DVDs online. They usually run about $12-$15 and many of them on the market are designed to give you a full toning workout in 20-30 minutes. Pop one of these into the DVD player when you get up in the morning before your shower, or at night after work and before dinner, and there you go: that 30 minutes you would have spent reading email with your coffee has now been spent giving you a healthy, energized body. If you really get into it, do one in the morning and a different one at night. You will hardly notice each 30 minutes you've spent in the comfort of your own home, but at the end of the day you've exercised for an hour without really having sacrificed much.
The same goes for cooking and preparing food. So often people tell themselves they don't have time to make a healthy lunch and bring it to work. In reality, it takes less time to whip something up at home and toss it into a bag than it takes to leave the office, walk or drive over to the deli or take-out place, stand in line, and return to the office with your food. And when you add in the money you save from bringing your own lunch, the health benefits are the biggest benefit but by no means the only one! Generally what I see when I begin working with people is that lunch is their unhealthiest meal; they are either skipping lunch entirely because they "don't have enough time", or they are scarfing down a nutritionally-deficient meal laden with calories, fat, and sodium because it was whatever they could grab at the nearest food joint. Instead, try stocking the kitchen with the following easy lunch staples: nuts of various kinds, fresh fruits, hummus, beans (either home-cooked or in a can), chopped raw vegetables, cooked vegetables (dinner leftovers are great for this), cooked rice (can be made ahead of time and kept for days), carrot and celery sticks, dried fruit, whole grain bread or wraps, zip lock bags and small plastic containers. Here is a lunch idea: fill one ziploc bag with a small handful of nuts mixed with a little bit of dried fruit, another one with a bunch of carrots and celery sticks, a small plastic container of hummus, and a small container of beans tossed with brown rice and a little olive oil and vinegar. If you have some raw or cooked vegetables (dinner leftovers are great for this), toss them in with the beans and rice.
Another lunch idea: grab a piece of fresh fruit or a little bag of fresh berries, a little bag of olives, a whole grain wrap spreaded with hummus and filled with raw or cooked veggies, and a small container of fresh salad on the side. You can mix and match the parts and use your imagination; it doesn't have to be fancy, it has to be functional. For some great, easy veggie ideas and to make sure you are covering your bases, read the Varying your Veggies post further down on this page.
Most importantly, when it comes to time and having enough of it, as paradoxical as it may seem, you need to SLOW DOWN. We do so much rushing around these days, it's no wonder we are in a fit over having enough time. This is such an important thing to remember in our day to day life, because the days will pass whether we are noticing them or not, and our valuable moments can pass us by if we are not careful to appreciate them. Take this lesson into the most basic aspects of your day. Remember to breathe, and be calm. You cannot and will not accomplish everything in one day; you aren't supposed to. Start to rethink the messages you repeat to yourself about not having enough time, and then be honest with yourself about it. Where can you carve out some more time from tasks that are not important to you and give that precious time over to the things you have been promising to do for yourself?
Stay tuned for more Tips on Time in following entries, including information about the importance of eating slowly and chewing, and how to save time and bucks by preparing easy, wallet friendly meals at home!
Interested in finding out more about what foods are right for your own body and why? Looking for personalized information and support to help you change your eating and lifestyle choices in order to achieve your own specific goals for health and wellness? Contact me to set up a consultation: erica@wellnessrealized.com
Subscribe to:
Posts (Atom)